 06-13-2010, 01:34 AM
|
#1 | |||
|
Fascinated by the World of Color

Join Date: Sep 2009
Location: So. California
Software: CS5 and PSE8
Camera: Sony NEX-5R & QX-100
Posts: 800
|
How To Use A Layered Template
***If someone else uses a program other than Photoshop, fill free to post a tutorial for said program here as well!!***
I know when I first started digi-scrapping, I got Photoshop Elements and downloaded a bunch a free templates and had NO IDEA how to use them! So here is a quick and simple tutorial on how to use those awesome layered templates to get started making some beautiful layouts! I use Photoshop Elements 8, but this is pretty much the same in all versions of Photoshop. Layered templates come in either .PSD or .TIFF files. Both work the same way. Let's start by downloading a template! I went ahead and made one for this tutorial, which you can get HERE!! I have included 2 versions of the same template. One (which I am using in this tutorial) that is just the paper layers, and another with included element guides if you chose to use them. Open Photoshop. Open a layered template. Go to File>Save As and save this project under a new name so you don’t accidentally save over your original template. 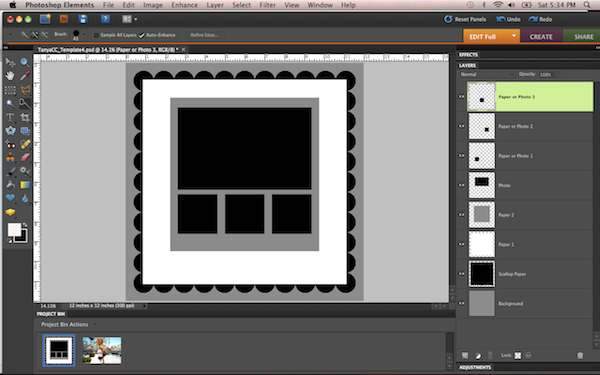 Open a photo. 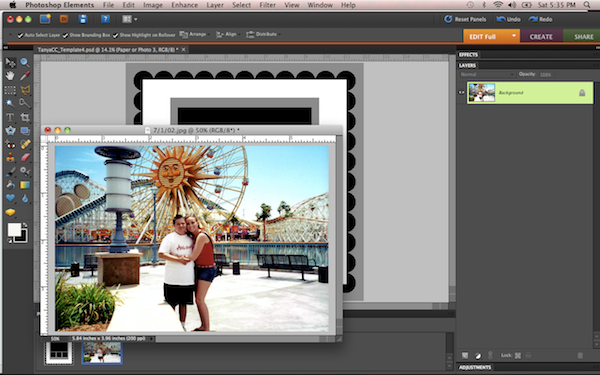 Drag your photo onto the template. Position the photo so that it covers the spot for the photo in the template. 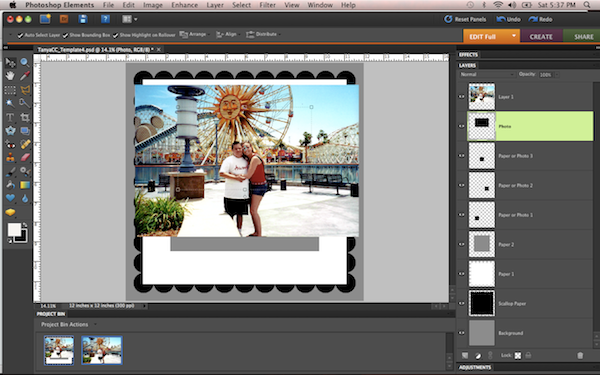 Go to Layer>Create Clipping Mask (Keystroke: Ctrl+G in PSE, Shft+Ctrl+G in PS, Apple+G on a Mac). 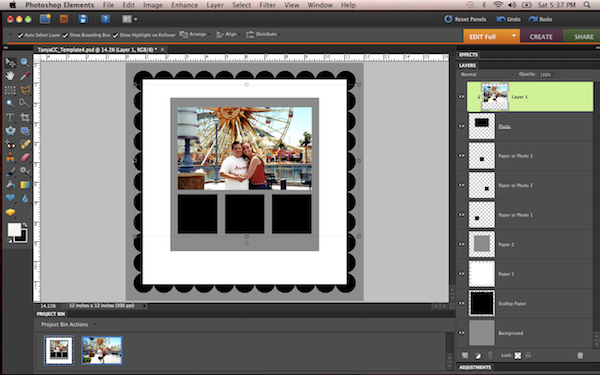 With the photo layer active (it will be highlighted), resize and rotate the photo until the desired portion is visible. I resize by moving any of the 4 corners of the photo. If you use the sides of the photo, it will distort the photo. 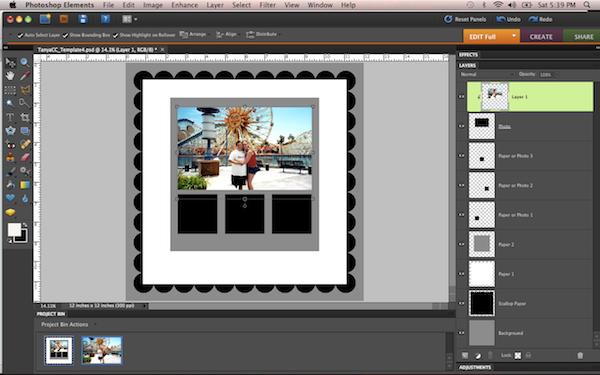 Right click on the photo layer in the Layers Palette and select “Merge Down” from the drop down menu to merge your photo into the template layer. Or use Layer>Merge Down or Keystroke Ctrl+E, Apple+E on a Mac. 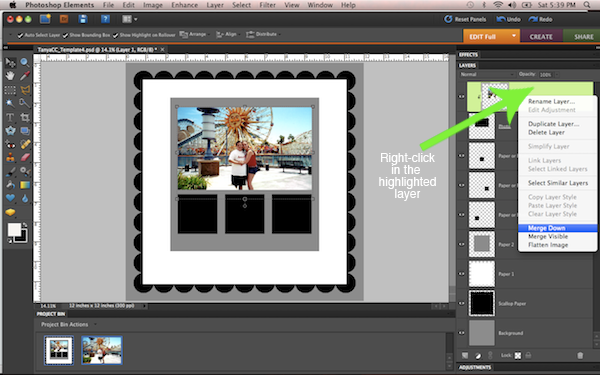 Open a paper from any of your digi - scrapping supplies. 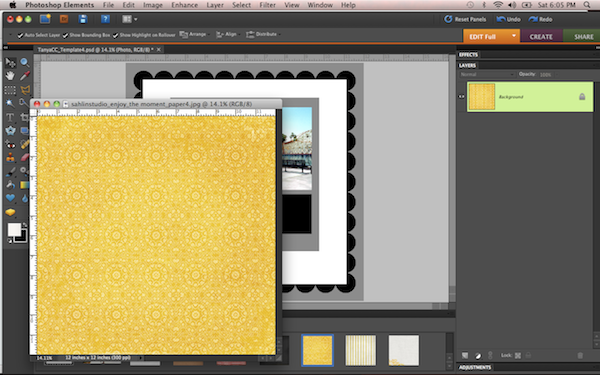 Click and drag your paper onto the template. Click on the paper layer in the Layers Palette and drag down until it is directly above the template layer you want to clip it to. 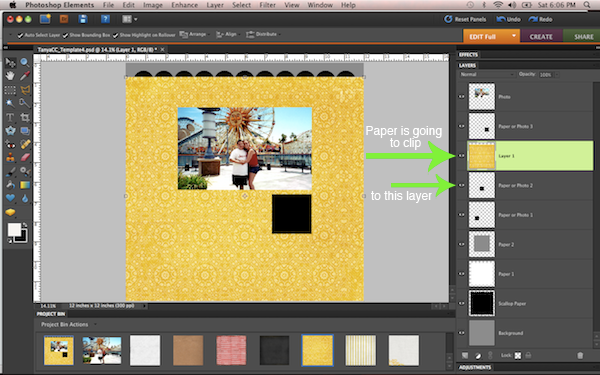 Now we are gonna clip it just like me did the photo earlier. Go to Layer>Create Clipping Mask (Keystroke: Ctrl+G in PSE, Shft+Ctrl+G in PS, Apple+G on a Mac). 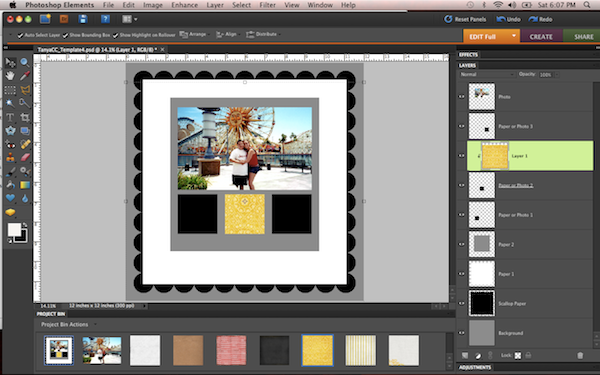 Just like we did with the photo, right click on the paper layer in the Layers Palette and select “Merge Down” from the drop down menu to merge your paper into the template layer. Or use Layer>Merge Down or Keystroke Ctrl+E, Apple+E on a Mac. All you have to do now is continue this process until you have all photos and/or papers placed on your template! After you get used to using templates, they become a really awesome base for starting your pages. You can rotate them, move the layers around and even delete/add layers. Here is the layout I made with the template using Enjoy The Moment by Sahlin Studio:  


|
|||

|

|
|||
| Sponsored Links |
|
|
 Sponsored links
|
|


 Threaded Mode